

Panahon na naman ng graduation kaya marami sa mga college graduates ang tiyak na sisimulan na ang paghahanap ng trabaho.
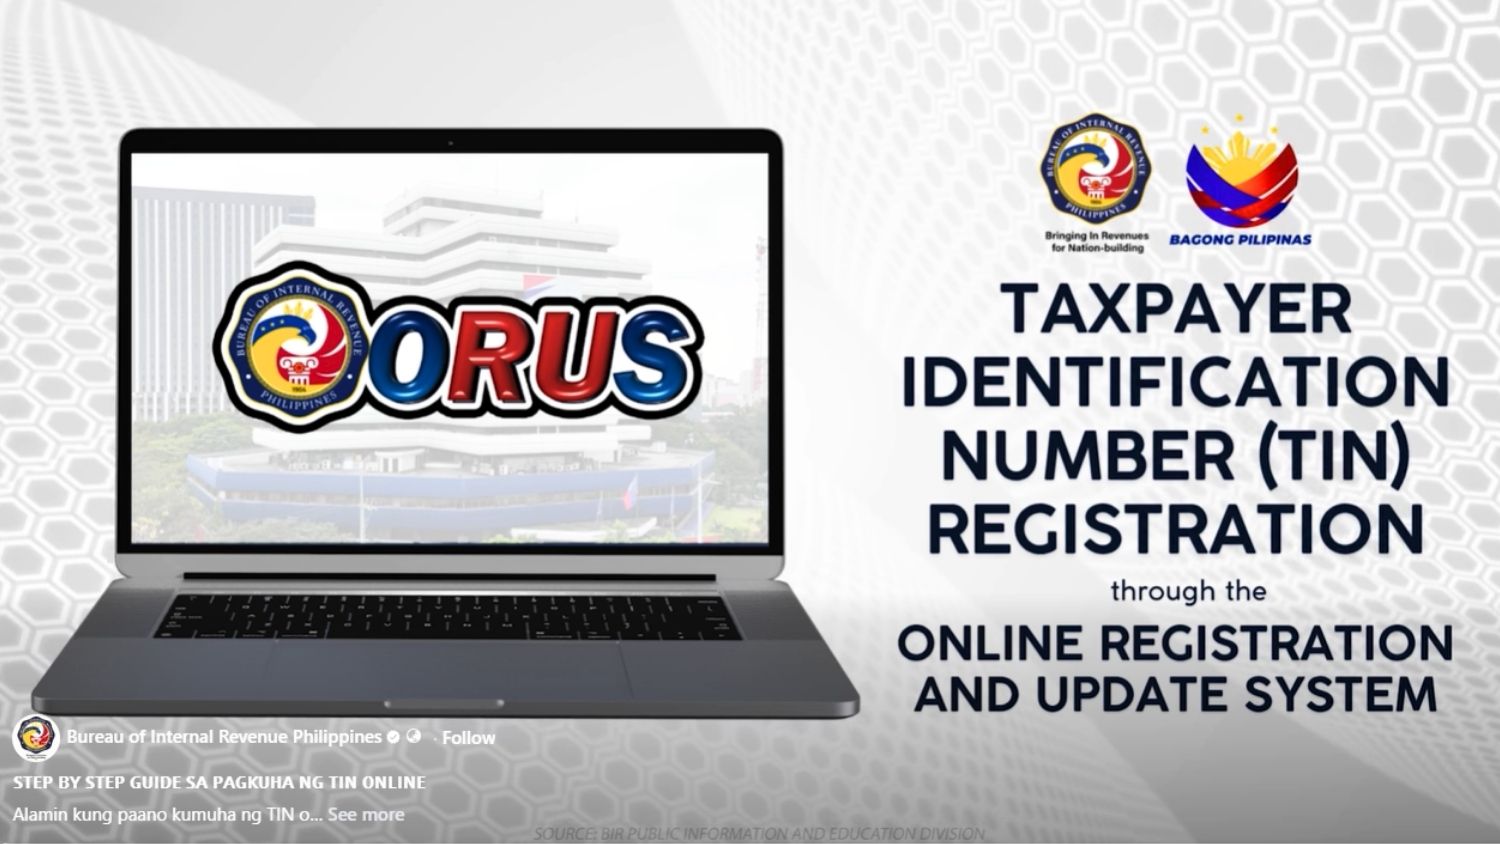
Isa sa mga importanteng documents at identification (ID) na hihingin ng mga employers ay ang Taxpayer Identification Number o TIN, na magagamit din sa mga transactions sa government agencies at banks.
Kamakailan, naglabas ng step-by-step video ang Bureau of Internal Revenue (BIR) para sa mga first-timers.
Dalawa ang paraan para makakuha ng TIN: una via online at pangalawa ang walk-in processing sa Revenue District Office o RDO.
Read: High school student in Butuan gets 41 local, international awards
HOW TO GET TIN ONLINE
Creating a BIR account online
Convenient ang online application dahil hindi na kailangang bumiyahe at pumila.
Ang processing ay aabutin ng three working days.
Narito ang sunud-sunod na hakbang sa pag-a-apply ng TIN.
Bumisita sa www.bir.gov.ph at i-click ang eServices tab. Hanapin ang Online Registration and Update System (ORUS) icon. Narito ang direct link: https://orus.bir.gov.ph
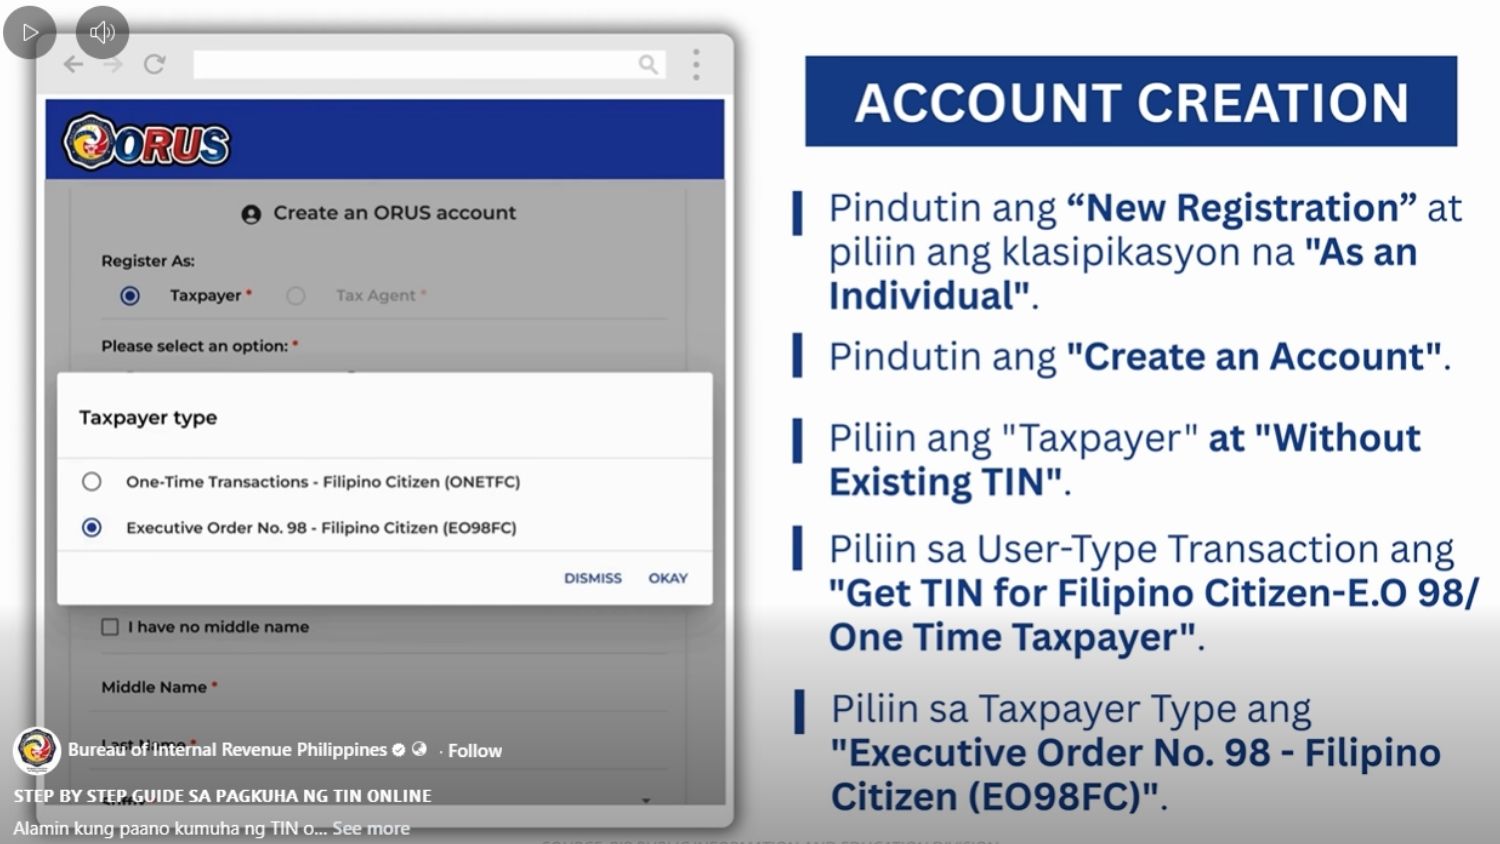
- Mag-create ng account sa BIR.
- Pindutin ang “New Registration” at piliin ang “As an Individual” classification.
- Scroll down at i-click ang “Create an Account”.
- Basahin ang ORUS Terms of Service and User Agreement. I-click ang Check Box. I-click ang “Agree” button.
- Piliin ang “Taxpayer” at “Without Existing TIN."
- Basahin ang paalalang lalabas sa screen, at pindutin ang “I Agree” button.
- Piliin sa User-Type Transaction ang “Get TIN for Filipino Citizen-E.O 98/ One Time Taxpayer.” Pindutin ang “OK” button.
- Lalabas ang Taxpayer type at at pindutin ang “Executive Order No. 98 – Filipino Citizen (EO98FC)."
- I-fill out ang form at ipasok ang mga impormasyong naka-asterisk (*).
- Pindutin ang “I’m not a robot” at “Register."
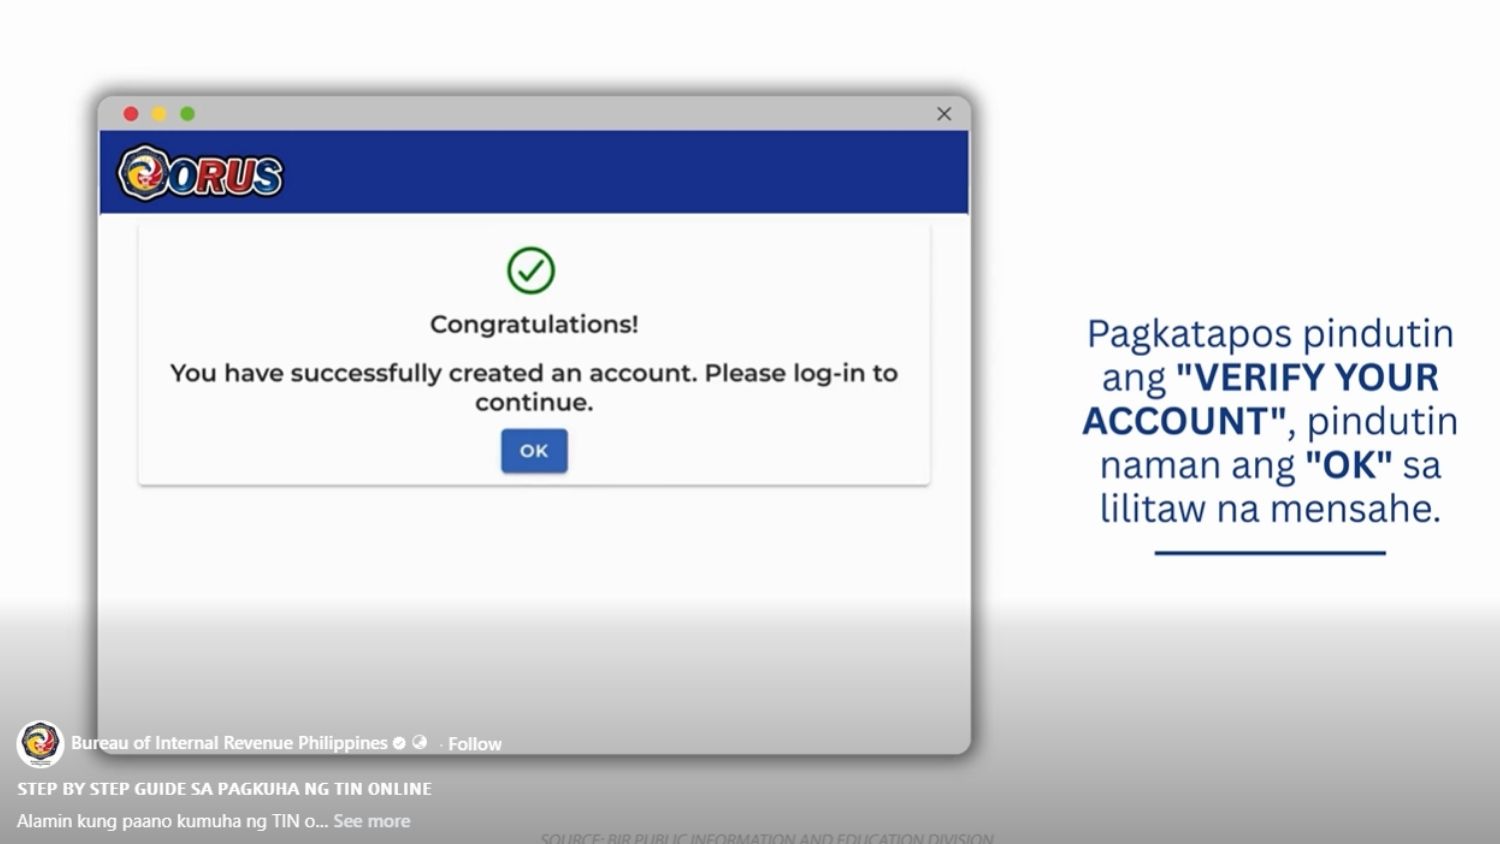
- Matapos mag-register, pumunta sa iyong email account at i-open ang Account Verification message. Pindutin ang “Verify Your Account.”
Reminder: Kung wala sa iyong Inbox ang Account Verification email, tingnan ito ang Spam Folder.
Once na-verify mo ang account, puwede ka nang mag-log in gamit ang iyong ini-register na email account at password.
APPLYING FOR A TIN
Kapag registered na ang online account mo sa BIR, susunod naman ay ang application ng iyong TIN.
Narito ang mga sumusunod na steps:
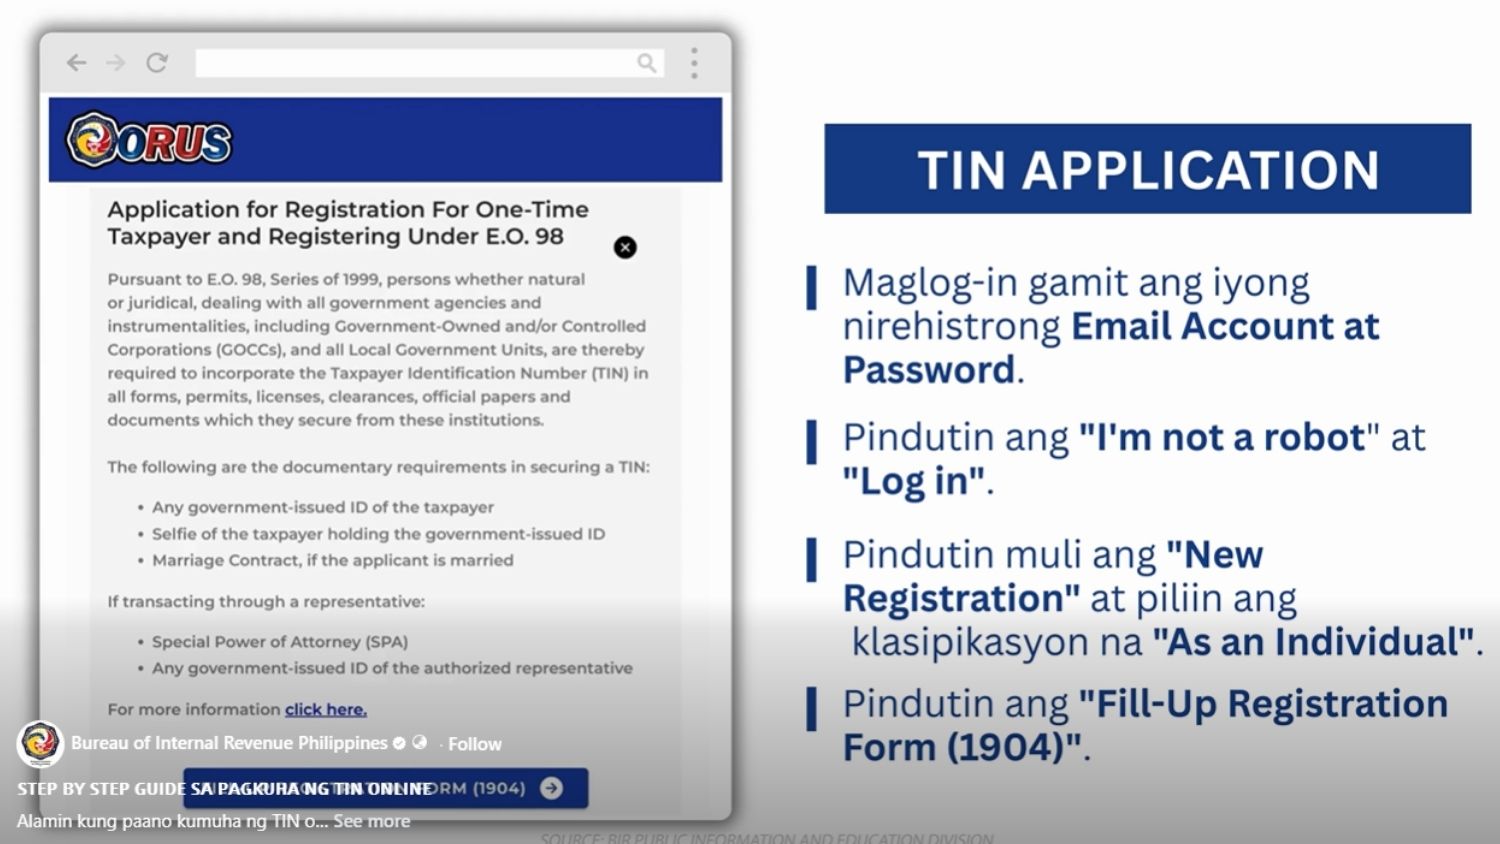
- Mag-log in gamit ang iyong account at password
- Pindutin ang “New Registration” at piliin ang “As an Individual” na classification.
- Scroll down at pindutin ang “Fill-up Registration Form (1904).”
- Sagutin ang mga naka-asterisk na information.
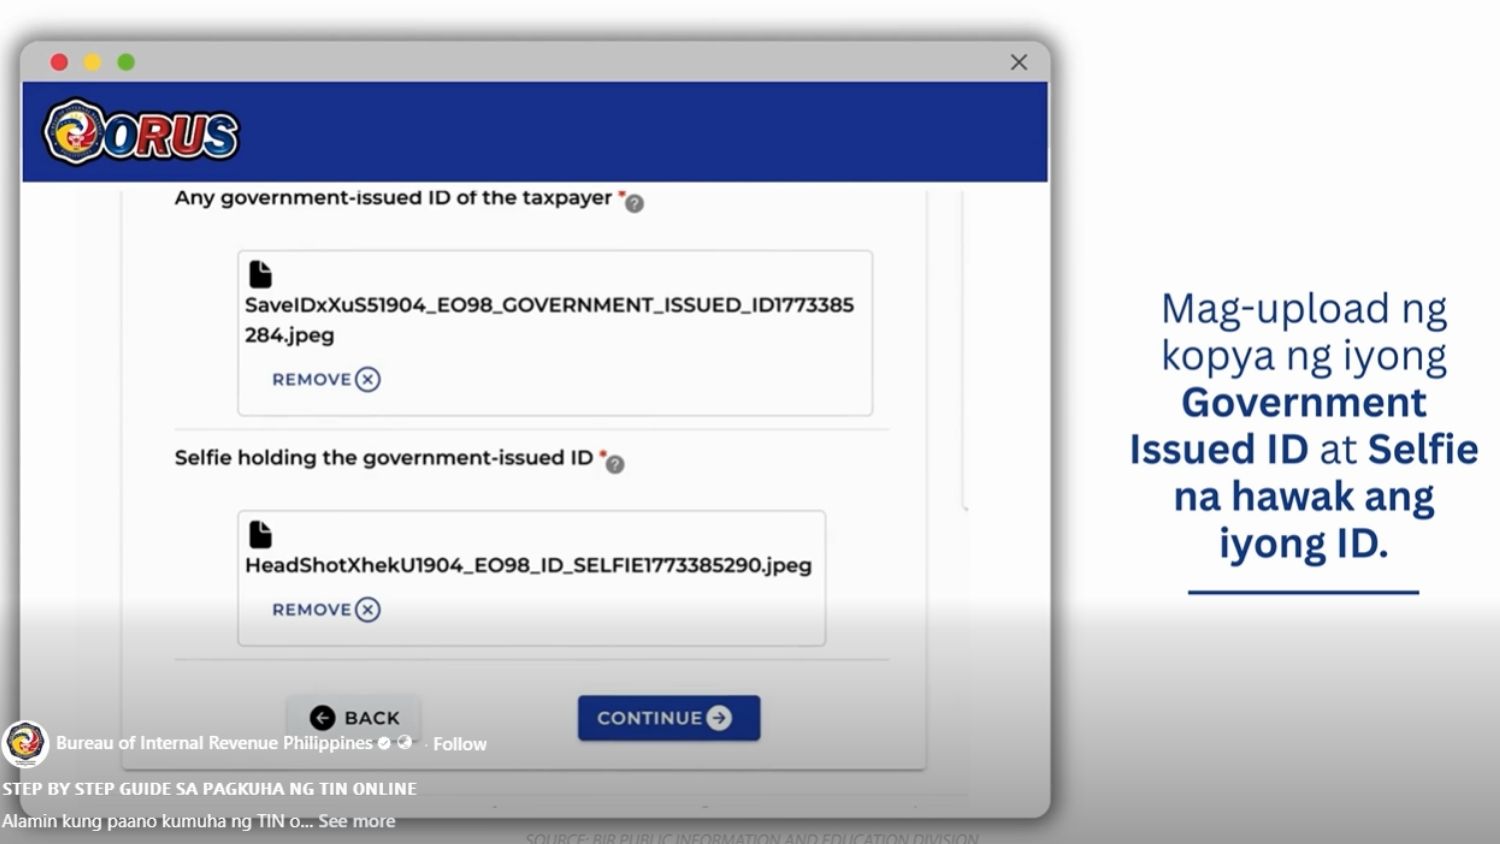
- Mag-upload ng copy ng government-issued ID at ang selfie na hawak ang ID.
- I-double check muna ang mga inilagay ng impormasyon at i-check lahat ng kahon.
- Pindutin ang “Submit Application.”
- Hintayin ang lilitaw na mensahe at pumunta sa iyong email at buksan ang “BIR ORUS: Form 1904 Submitted” para sa detalye ng application.
Reminder: Tiyaking tugma ang ilalagay na impormasyon sa “Residence Address” sa ID na ini-upload.
Sa loob ng three working days, makakatanggap ng email na naglalaman ng update kung aprubado ang iyong TIN application.
Kapag approved ang applicaiton, makikita ang TIN sa message at sa ORUS account na iyong ginawa.
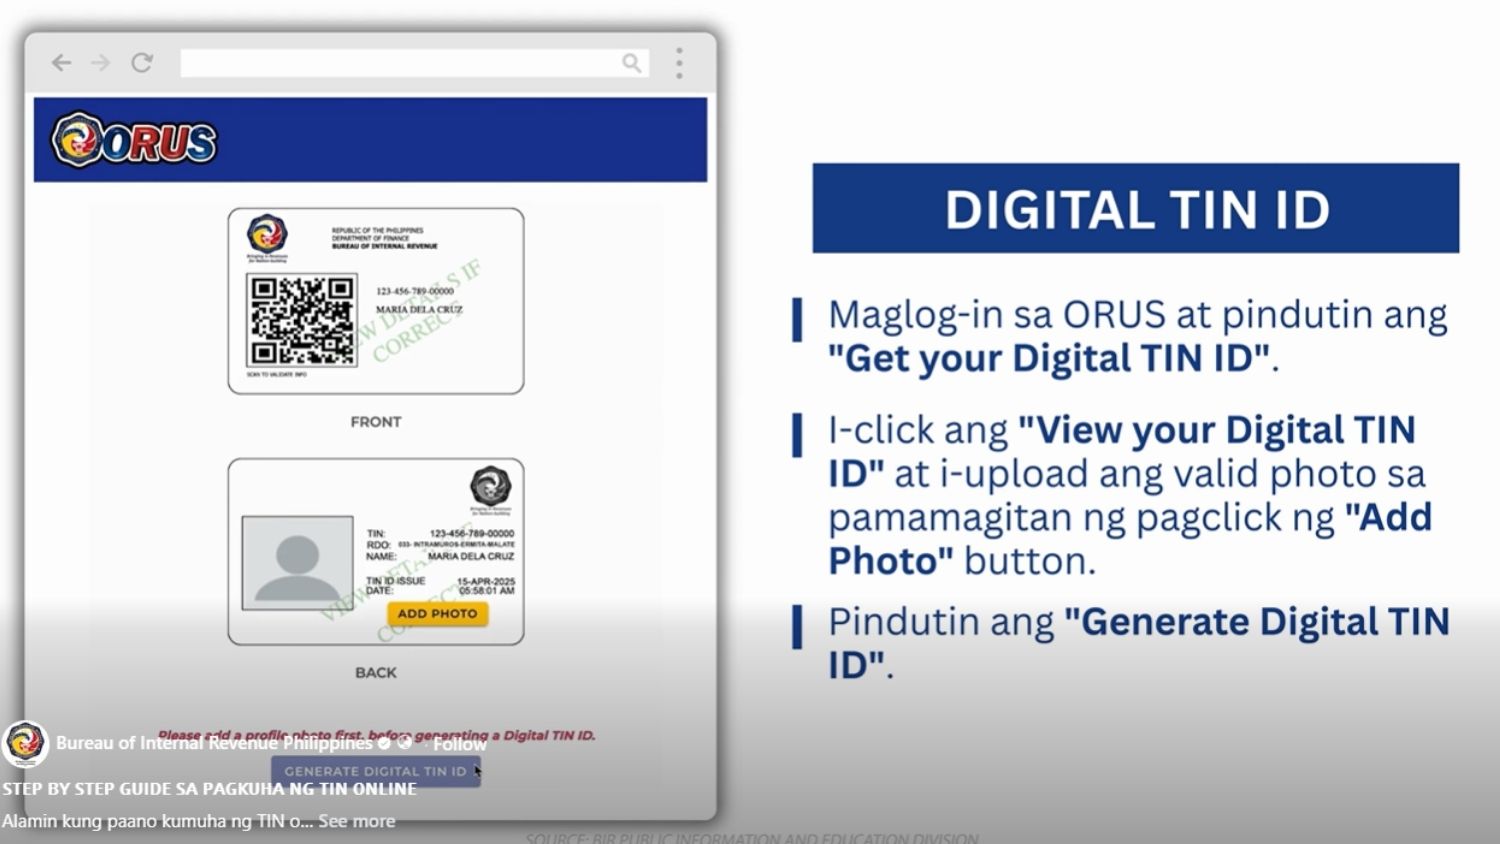
HOW TO GET YOUR DIGITAL TIN ID
Kapag approved ang iyong application, ang pagkuha naman ng digital TIN ID ang dapat na asikasuhin.
Narito ang mga sumusunod na hakbang:
- Mag-log in sa ORUS at pindutin ang “Get Your Digital TIN ID.”
- Pindutin ang “View your Digital TIN ID” at i-upload ang valid photo sa pamamagitan ng pag-click ng “Add Photo” button.
- Pagkatapos ay i-click ang “Generate Digital TIN ID” at basahin ang information message. I-click ang “Confirm” button.
- Pindutin ang “Download Digital TIN ID” para mai-download ang digital TIN ID at puwede mo na itong mai-print.
 Photo/s: Bureau of Internal Revenue Philippines on FB
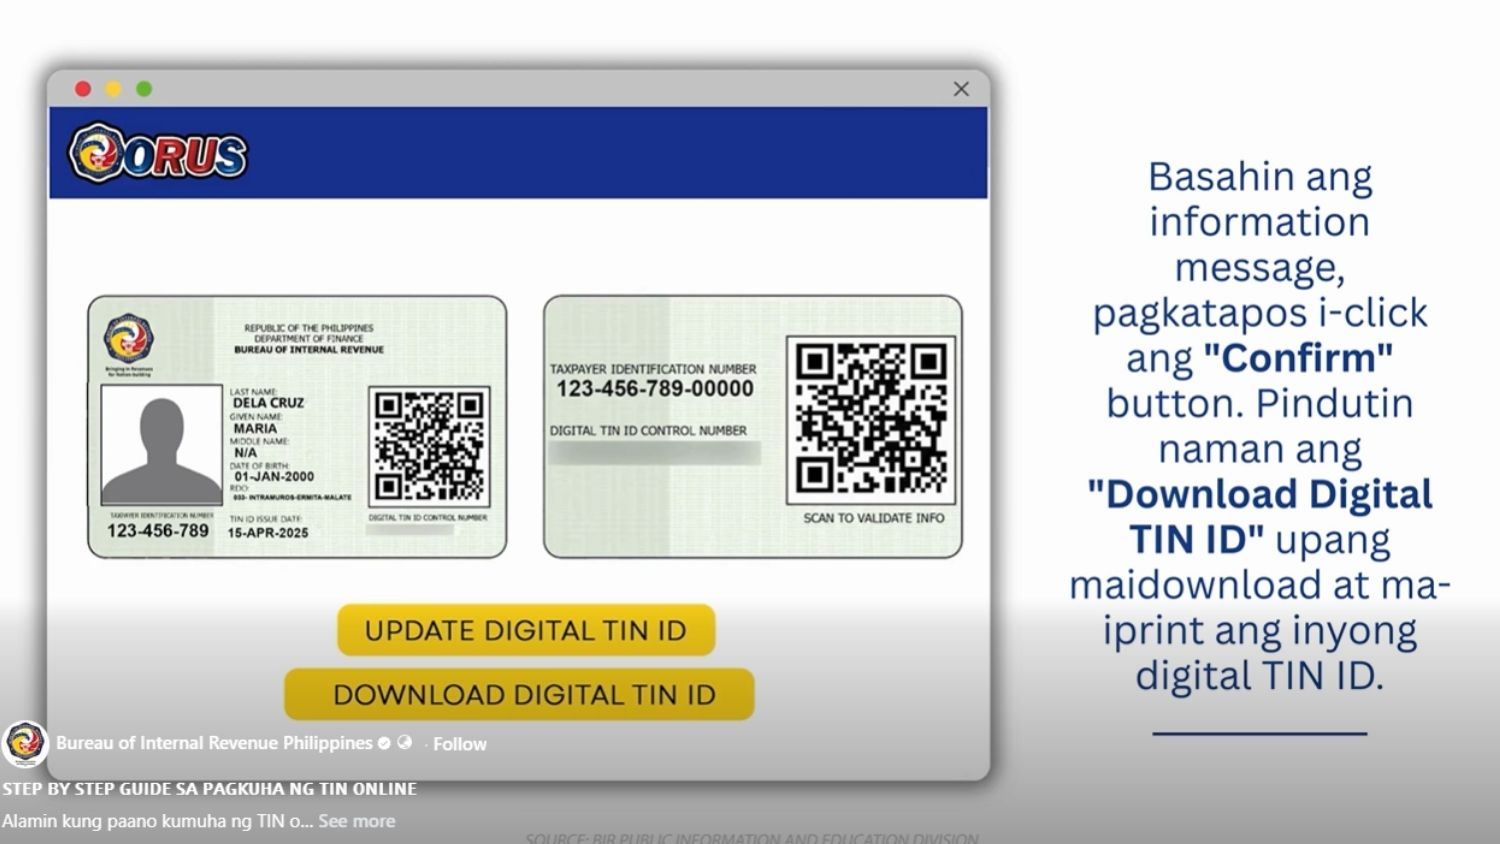 Photo/s: Bureau of Internal Revenue Philippines on FB
WALK-IN APPLICATION
Kapag walk-in application naman, magtungo sa Revenue Districe Office na may jurisdiction sa lugar kung saan ka nakatira.
Oras na makumpleto ang requirements, makukuha ang TIN at stamped BIR Form 1902. na ayon sa BIR, ay tatagal lamang ng 15 minutes.
Importanteng paalala, ang pagkuha ng TIN online man o walk-in ay libre.
Read: Meralco tips to save up to PHP2K on monthly electricity bill